Grocery List Manager
Welcome to our Android Grocery List Manager application! This user guide will help you get started in using our application to help you shop for groceries more efficiently using our application to help you keep track of your lists, and the various items you shop for on a day to day basis.
Contents
- Getting Started
- Creating a List
- Creating Items and Adding Them to Your List
- Searching for an Item
- Selecting Lists
- Grouping Items in a List
- Deleting Lists
- Deleting Items
- Renaming a List
- Checking Off Items
- Frequently Asked Questions
Getting Started
After intially loading up the GLM application, you will be taken to the launcher menu. This menu will display your current lists, of which you currently have none. To create a new list, press the + icon located at the top right of the screen. You will now begin creating your first list.

Creating a List
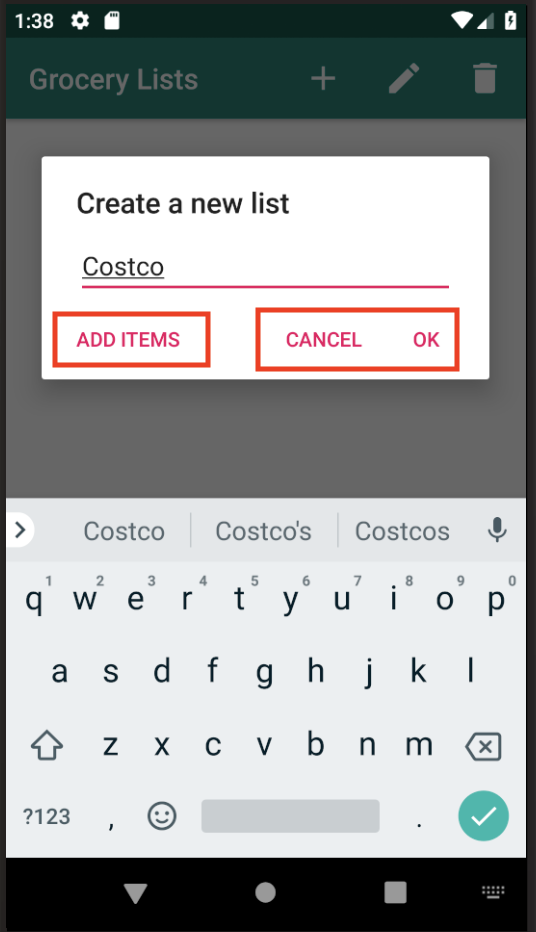
After selecting the + icon in the launcher menu, you have initiated the process for creating your first list. Enter a name for your new list. You may now select the option “OK” to finish, which will create your list and add it to the launcher menu, or you may add items to the list before finishing, by selecting “Add items”.
Creating Items and Adding Them to Your List
Now that you have created a list, you can begin to add items to it. Select your list to begin adding an item. When using the application for the first time, you list will be empty. You can add pre-created items to your list, or create a new custom item. To create a new item, select the + symbol located at the top right of the screen, then name your item and select a type. This item will now appear under that type. To add this new item to your list, select that item type, then you will find the item. You can select the item and then select a quantity for the item. Once you hit OK, the item will be saved to your list.


Searching for an Item
You may find it to your advantage to utilize the searching feature to quickly find the item you are looking for. When adding an item to a list, click on the Search bar located at the top of the screen, and then enter the name of the item you are looking for. You may also enter partial queries and do not have to search on the full name of the item. If the item exists, you will find it displayed in a pop up. If the item does not exist, you will be notified that there are no results matching your entry. This will ease the process of creating new items if you do not know whether or not it exists in your application.


Selecting Lists
Perhaps you need to make trips to multiple groceries, or you may find it to your advantage to have multiple lists for each store. With the Grocery List Manager you have the ability to create multiple lists which contain their own items. You can create a new list by going back to the launcher menu at any time, and selecting the option to create a new list once again. After you have set the name and finished creating the list, you can now select which list you wish to view when revisiting the launcher. To do this, from the launcher menu, click on the list you wish to view, this will open the list so you may view its contents.
Grouping Items in a List
To group items in a list, enter the list, then select the three dotted button at the top right of the screen. You will be presented with an option to “Group by Type”. Once you select this option, it will group the list by item types.

Deleting Lists
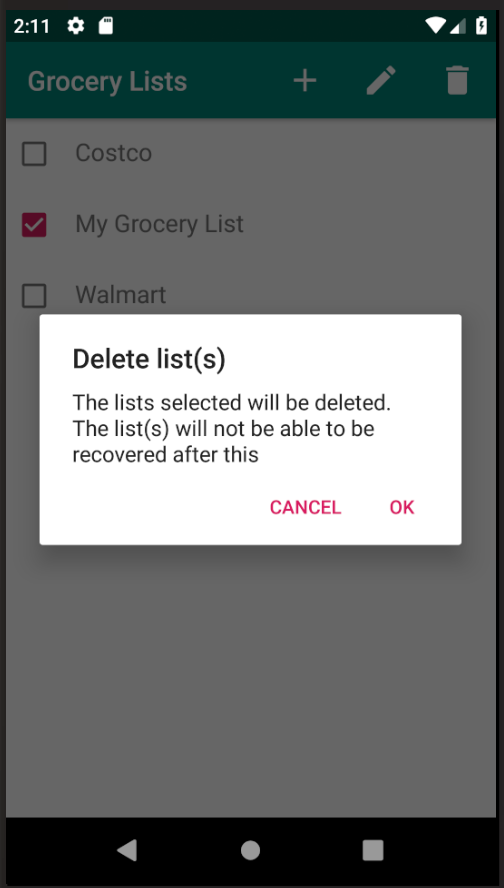
Deleting lists once they are no longer needed will allow you to keep your Grocery List Manager in check, allowing you to efficiently shop without the hassle of worrying of finding the list you need. To delete a list, simply click on a list from the launcher menu, then select the “Trash” button at the top right of the screen. You will be presented with an option to confirm your desicion before your list is deleted, in case of any error. Once you have verified that this is the list you intend to delete, select “Delete”.
Deleting Items
To delete an item from a list, press down on the item for one second. This will give you the option to delete the item from the list.
Renaming a List
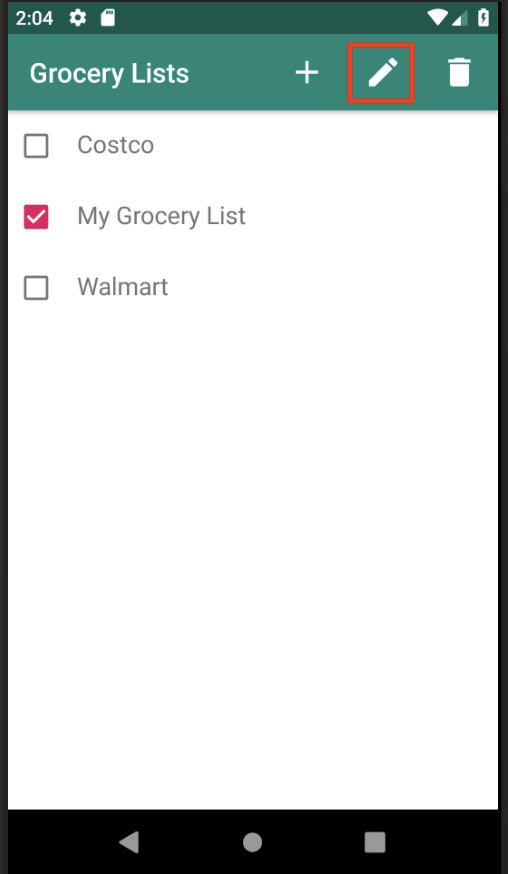
To rename a list, enter the list you wish to rename. Select the pencil button at the top right of the screen which will present you with the option to rename your list. Select Rename List, then enter a new name for your list and confirm.

Checking Off Items
To maximize the utility of the Grocery List Manager, you might want to make use of the feature which allows you to check off items. This will allow you to track what you have purchased during your grocery trip, which will prevent you from repeatedly grabbing the same item when shopping. It’ll also benefit you in making it clear once you have completed your grocery shopping needs. To check off items in your list, enter your list then press the box to the left of the item you wish to check off. This will now put a check in the box, indicating that you have put the item in your shopping cart.
You can clear all check boxes from a list by selecting the three dotted button at the top right of the screen, then selecting the “Clear All Boxes” option. This will clear all the check boxes, allowing you to convienently reuse the list as needed.

Frequently Asked Questions
I created a list and created new items, but I do not want to have to create these items every time when I shop. Will my items remain in the system?
When you create a new item, it is stored in the applications database, so you will not have to create that item again.
Can I have two lists with the same items?
Yes, you can have two lists with the same items.
I created a list that I don’t need anymore. If I delete my list, will I need to recreate the items that were added to that list?
No, when you create an item, it is added to the database. Deleting a list will remove that list and any items it contains, but the items will still exist in your database, so you will not have to recreate those items when adding them to a new list.